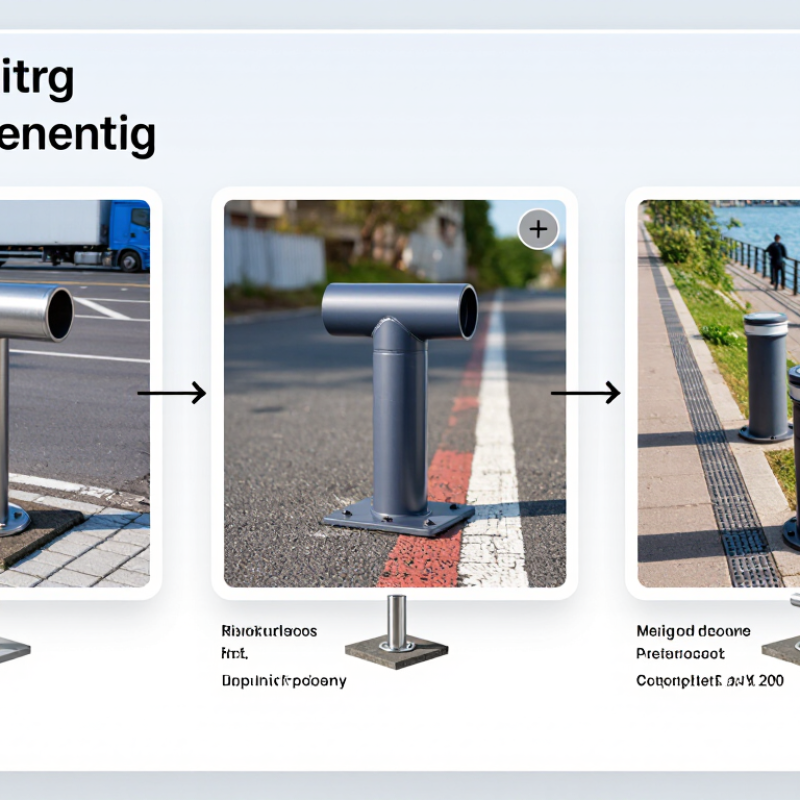
Choosing a Tee Head Bollard in 2026 is less about appearance than matching the post to its site. At a loading entrance, its crossbar may help guide a reversing truck, while a waterfront path may need clear pedestrian separation. Small details matter. Check height, tube diameter, wall thickness, finish, and fixing method against expected impacts and local exposure. These factors affect visibility, corrosion resistance, and maintenance—not just the product’s stated strength. That strength can be easy to overread.
Before comparing models, define the bollard’s job: marking a boundary, protecting equipment, managing vehicle movement, or handling several tasks. Measure clearances and note ground conditions, including paving thickness, drainage, and nearby services. A base plate may suit sound concrete; a buried installation may require different groundwork. Neither option is automatically better. For example, a narrow service lane may need a compact head that stays visible without clipping mirrors or restricting access. Coastal air, road salt, and frequent washdowns can also influence the finish choice. Review manufacturer drawings, load information, installation instructions, and maintenance guidance. Even a well-specified post can disappoint if installation falls short; that deserves an honest second look. Specifications vary. When impact risks or foundation conditions are uncertain, seek advice from a qualified site professional. The right choice is a documented fit for the actual site, not a guess based on shape alone.
A tee head bollard is a vertical post with a short horizontal bar across its top. It can mark a boundary, discourage vehicle access, and provide a visible point to grasp briefly. That does not make it a certified handrail or impact barrier. Performance depends on the post, foundations, spacing, and documented testing. Easy to miss.
For pedestrian layouts, NACTO’s Urban Street Design Guide recommends a 5-foot-wide clear through-zone, enough for two people to walk side by side. Keep the bollard and its crosspiece outside that route where possible. Measure the full footprint, including projecting ends, rather than just the post diameter. For vehicle-impact protection, ask for independent test documentation suited to the site; an ornamental bollard should not be assumed crash-rated. Check fixing details against the actual paving, too. A post anchored into thin surface material may look secure but fail under load. The tee shape is useful, but it is not a substitute for checking access, visibility, and installation conditions.
Begin with what the bollard must control, not how it looks. Map vehicle routes, turning points, loading activity, and pedestrian desire lines during busy periods. A delivery van cutting a corner creates a different risk from occasional car parking. Note the approach speed, vehicle type, likely direction of impact, and whether access must remain open. Small details matter. Measure clear walking widths, door swings, wheelchair routes, and the space needed for emergency or service access. Photograph the site at peak use; an empty morning can hide the real conflict.
Then translate observations into protection requirements. Decide whether the tee head is mainly a visual boundary, a guide for pedestrians, or part of a tested vehicle-restraint system. Do not assume its shape or mass guarantees impact performance. Check documented test ratings, required spacing, embedment, and foundation conditions against the actual risk; installation can change performance. Locate buried services before fixing positions, and confirm drainage, paving depth, and maintenance access. A neat line on a plan may not work beside a curb or loading bay. That is worth reconsidering. Record who needs keys or removable access, which sightlines must stay clear, and how the bollards will be inspected. Have a qualified site or structural professional verify assumptions when vehicle-impact risk is significant.
A tee head bollard should suit its setting, not just match a drawing. Start with the material. Stainless steel resists corrosion well, but grade and exposure matter near salt or de-icing chemicals. Galvanized steel offers a practical protective layer, while cast iron brings substantial weight and a traditional appearance. Check wall thickness, anchoring details, and maintenance requirements alongside the material name.
Then compare finishes under real conditions. A coated surface can add color and help protect steel, but chips around the base may expose vulnerable areas. Hot-dip galvanizing can look uneven or develop a duller finish over time; that is not always a defect. Ask how touch-ups work and inspect a sample outdoors, not only under showroom lighting. Small details count.
Tee head designs vary in width, profile, and edge shape. A broad, rounded crosspiece may be easier to see and grip, while a narrow profile can look less prominent. Check clearance for nearby doors, pedestrian routes, and other street furniture. For a busy site, visibility and impact resistance may matter more than a perfectly uniform finish. Measure twice. One choice can still feel wrong once installed, so compare drawings with the actual space and confirm that the fixing method suits the surface.
| Comparison factor | Common options or typical details | Advantages | Limitations and selection notes | Best suited to |
|---|---|---|---|---|
| Carbon steel | Welded or fabricated steel body; often supplied with a protective coating or galvanizing. | Strong, widely available, and easy to fabricate in different heights and tee-head shapes. Usually a cost-effective choice. | Unprotected steel can rust when exposed to moisture. Check the coating system, weld protection, drainage, and maintenance requirements. | General outdoor use where a durable, economical bollard is required. |
| Stainless steel | Common grades include 304 and 316. Grade 316 generally offers better resistance to chloride exposure than grade 304. | Corrosion resistant and suitable for a clean architectural finish. Often needs less repainting than uncoated carbon steel. | Typically costs more than carbon steel. Grade choice should reflect exposure; stainless steel can still stain or corrode in unsuitable conditions. | Architectural locations, coastal areas, or sites where appearance and corrosion resistance are priorities. |
| Cast iron | Cast body with a formed tee head; may be painted or otherwise protected. | Allows traditional profiles and substantial-looking forms. Can suit heritage or period-style settings. | Cast components may be brittle under impact compared with ductile or fabricated steel. Inspect for cracks and confirm the product’s intended use. | Heritage streetscapes, parks, and settings where a traditional appearance is important. |
| Hot-dip galvanizing | A zinc coating applied to fabricated steel after manufacture, where the design and fabrication process allow. | Provides corrosion protection to exposed steel surfaces and can protect areas that are difficult to paint. | The finish is usually utilitarian rather than decorative. Confirm that cut edges, welds, and any later modifications are appropriately protected. | Outdoor or industrial settings where long-lasting corrosion protection matters more than a polished appearance. |
| Powder coating or paint | Colored coating applied over a suitable prepared substrate; systems vary by environment and preparation. | Offers a broad choice of colors and can help coordinate bollards with site finishes or wayfinding. | Impact or abrasion can damage the coating and expose the substrate. Coating performance depends on surface preparation and the specified system. | Public spaces, entrances, and sites where color, visibility, or a coordinated appearance is desired. |
| Brushed or polished stainless finish | Brushed finishes have a directional grain; polished finishes are more reflective. | Brushed surfaces can help reduce the visibility of minor marks. Polished surfaces create a brighter, more formal appearance. | Reflective finishes may show fingerprints and scratches more clearly. Neither finish replaces selecting a suitable stainless-steel grade for the exposure. | Building entrances, plazas, and other architectural settings. |
| Straight tee head | A horizontal crossbar centered on a vertical post, forming a simple T-shaped profile. | Clear, recognizable silhouette with a straightforward, symmetrical appearance. | Check the crossbar projection and overall width against pedestrian routes, adjacent walls, and accessible circulation space. | Contemporary streetscapes and locations that suit a simple geometric design. |
| Rounded or softened tee head | Crossbar ends and edges are rounded, radiused, or otherwise softened. | Creates a less angular appearance and avoids sharp exposed corners when properly designed and finished. | Confirm that the shape remains easy to see and that the finish has no rough edges or poorly finished joints. | Pedestrian areas, parks, and public spaces where a softer visual profile is preferred. |
| Low-profile tee head | A shorter or more compact crossbar compared with a prominent, wide tee head. | Can look visually restrained and may reduce projection into nearby circulation space. | May be less noticeable from a distance. Consider contrast, lighting, and placement where visibility is important. | Compact sidewalks and sites where a discreet appearance is preferred. |
| Height and post diameter | Many pedestrian bollards are roughly 750–1,000 mm (about 30–39 in) high; diameters vary by product and application. | Choosing a size suited to the site can improve visibility and maintain a consistent streetscape. | These are indicative dimensions, not universal requirements. Check local accessibility, safety, planning, and project specifications before selecting. | Initial product screening and coordination with the site layout. |
| Mounting and installation | Options commonly include cast-in or embedded installation and surface mounting with a base plate and suitable anchors. | Embedded installation can provide a clean base appearance; surface mounting can be practical where the substrate and fixing system are suitable. | Performance depends on the foundation, substrate, embedment or anchor design, and intended loading. Confirm installation details with the manufacturer and project engineer. | Any project where the bollard must be matched to existing paving, foundations, or site conditions. |
| Final selection checklist | Compare exposure, material, finish, tee-head projection, dimensions, installation method, and maintenance needs. | A structured comparison helps balance appearance, durability, visibility, and lifecycle costs. | Do not assume a decorative tee-head bollard provides vehicle-impact protection. Specify a tested, rated security bollard when impact resistance is required. | All projects before ordering or finalizing specifications. |

Note: Dimensions and material options shown are general selection guidance, not a product specification. Confirm exact dimensions, coating system, installation details, applicable standards, and suitability for the site with the project team.
Choosing a tee head bollard starts with the opening it must protect. Measure the clear width, turning space, and pedestrian route on site, not only the drawing. The 2010 ADA Standards specify a 36-inch minimum accessible-route width in typical conditions; keep bollards outside that usable path. A wider post is not automatically stronger. Check the complete tested system, including its foundation and spacing. ASTM F2656/F2656M impact ratings use defined vehicle conditions; an M30 test involves a 15,000-pound vehicle traveling at 30 mph. That rating describes tested performance, not a guarantee for every site.
Installation depends on the ground beneath the surface. Embedded bollards need adequate footing depth, suitable soil, and coordination with buried utilities. Surface-mounted units may suit existing concrete, but only when the slab and anchors are designed for the expected loads. Verify slab thickness, reinforcement, drainage, and edge distance before drilling. One overlooked pipe can change the whole layout. I would also check snow clearance and maintenance access; these details are easy to underestimate.
Tips: Match the specified impact rating to the site risk, then confirm the exact model’s test documentation. Ask a qualified engineer to review foundation details. Mark the proposed centers on the pavement and walk the route before installation. If the site has uncertain soil or utilities, pause and investigate rather than guessing.
How to read this chart: These are representative planning dimensions, not a universal specification. Choose the exposed height and diameter to suit the site’s clearance and guidance needs. The embedment depths shown are indicative starting points; soil, foundation design, and expected loads can change requirements.
Installation: Embedded installation is commonly considered for new construction or where a below-ground foundation can be provided. Surface mounting may suit an existing, suitably designed concrete slab; confirm slab capacity, anchors, and edge distances. Where vehicle impact resistance is required, use a bollard and foundation system designed for the site’s specific performance requirements.
Before selecting a tee head bollard, confirm what the site actually requires. Check local project specifications, accessibility clearances, mounting details, and any stated impact-performance criteria. A product sheet should identify materials, dimensions, finish, and installation requirements. If a requirement is unclear, ask the project engineer or relevant authority before ordering. Guesswork gets expensive.
Inspect the proposed location, too. Measure the clear space around the bollard and note nearby doors, vehicle paths, and drainage. The tee-shaped top can affect handling and clearance, especially on narrow walkways. Small details matter. Do not assume that a model suited to one site will meet another site’s needs. A clean finish alone does not prove compliance; keep product documents and installation records together for future checks.
Plan maintenance before installation. Set a regular inspection interval based on exposure, traffic, and the supplier’s care instructions. Look for loose fixings, movement at the base, rust, cracked coatings, and sharp damage around the tee head. After a vehicle strike or unusual impact, arrange a closer assessment, even when the bollard still looks upright. Record dates, photos, and repairs. It is easy to miss gradual loosening. Maintenance intervals may need adjusting after the first season, once real site conditions become clear.
Copyright © 2025 · All Rights Reserved · Franchino Mold & Engineering